NGINX, pronounced “Engine X” is an alternate web server for Apache. NGINX is an open source web server and a reverse proxy server for HTTP, SMTP, POP3 and IMAP protocols. If you plan to run a very busy and high concurrency websites but with low memory usage, i would suggest you to setup NGINX as a web server on your Virtual Private Server (VPS) or dedicated server.
1. Install nginx, PHP and MySQL :
ehowstuff@ubuntu14:~$ sudo apt-get install nginx php5 php5-fpm php5-mysql php5-curl php5-gd php5-intl php-pear php5-imagick php5-imap php5-mcrypt php5-memcache php5-ming php5-ps php5-pspell php5-recode php5-snmp php5-sqlite php5-tidy php5-xmlrpc php5-xsl mysql-server-5.6 -y
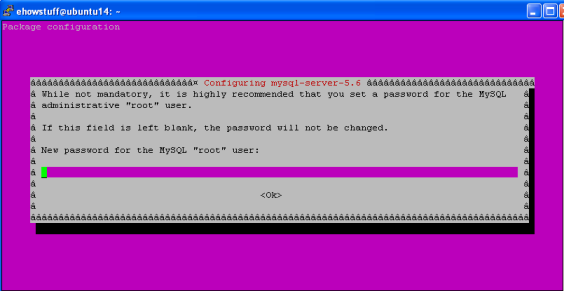
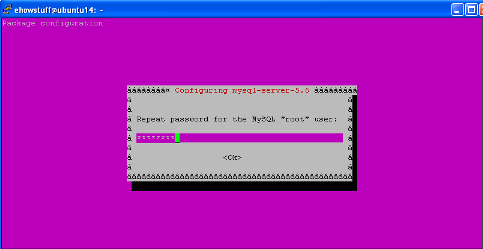
During this installation, you will require to set MySQL’s root password :
2. Open /etc/php5/fpm/php.ini and set cgi.fix_pathinfo=0:
ehowstuff@ubuntu14:~$ sudo vi /etc/php5/fpm/php.ini
; http://php.net/cgi.fix-pathinfo
cgi.fix_pathinfo=0

; FastCGI under IIS (on WINNT based OS) supports the ability to impersonate
; securi
3. Set date.timezone in /etc/php5/fpm/php.ini :
ehowstuff@ubuntu14:~$ sudo vi /etc/php5/fpm/php.ini
[Date]
; Defines the default timezone used by the date functions
; http://php.net/date.timezone
date.timezone = "Asia/Kuala_Lumpur"

; http://php.net/date.default-latitude
;date.default_latitude = 31.7667
4. By default PHP-FPM is listening on the socket /var/run/php5-fpm.sock. We have an option to make PHP-FPM use a TCP connection. Open and add “listen = 127.0.0.1:9000” and comment out “listen = /var/run/php5-fpm.sock”
ehowstuff@ubuntu14:~$ sudo vim /etc/php5/fpm/pool.d/www.conf
Change as below :
..
..
;   '/path/to/unix/socket' - to listen on a unix socket.
; Note: This value is mandatory.
;listen = /var/run/php5-fpm.sock
listen = 127.0.0.1:9000
..
..
5. Restart PHP-FPM :
ehowstuff@ubuntu14:~$ sudo service php5-fpm restart
stop: Unknown instance:
php5-fpm start/running, process 7314
6. Backup NGINX config file :
ehowstuff@ubuntu14:~$ sudo cp -p /etc/nginx/nginx.conf /etc/nginx/nginx.conf.bak
7. Check Number CPU on your VPS server. This will will require to adjust NGINX Worker Processes & Connections. NGINX workers is equal to the number of processors :
ehowstuff@ubuntu14:~$ lscpu | grep '^CPU(s)'
CPU(s):                1
8. Configure worker_processes on nginx.conf as below :
..
..
worker_processes 1;
..
..
Full nginx configuration should like below :
user www-data;
worker_processes 1;
pid /run/nginx.pid;

events {
        worker_connections 768;
        # multi_accept on;
}

http {

        ##
        # Basic Settings
        ##

        sendfile on;
        tcp_nopush on;
        tcp_nodelay on;
        keepalive_timeout 65;
        types_hash_max_size 2048;
        # server_tokens off;

        # server_names_hash_bucket_size 64;
        # server_name_in_redirect off;

        include /etc/nginx/mime.types;
        default_type application/octet-stream;

        ##
        # Logging Settings
        ##

        access_log /var/log/nginx/access.log;
        error_log /var/log/nginx/error.log;

        ##
        # Gzip Settings
        ##

        gzip on;
        gzip_disable "msie6";

        # gzip_vary on;
        # gzip_proxied any;
        # gzip_comp_level 6;
        # gzip_buffers 16 8k;
        # gzip_http_version 1.1;
        # gzip_types text/plain text/css application/json application/x-javascript text/xml application/xml application/xml+rss text/javascript;

        ##
        # nginx-naxsi config
        ##
        # Uncomment it if you installed nginx-naxsi
        ##

        #include /etc/nginx/naxsi_core.rules;

        ##
        # nginx-passenger config
        ##
        # Uncomment it if you installed nginx-passenger
        ##

        #passenger_root /usr;
        #passenger_ruby /usr/bin/ruby;

        ##
        # Virtual Host Configs
        ##

        include /etc/nginx/conf.d/*.conf;
        include /etc/nginx/sites-enabled/*;
}


#mail {
#       # See sample authentication script at:
#       # http://wiki.nginx.org/ImapAuthenticateWithApachePhpScript
#
#       # auth_http localhost/auth.php;
#       # pop3_capabilities "TOP" "USER";
#       # imap_capabilities "IMAP4rev1" "UIDPLUS";
#
#       server {
#               listen     localhost:110;
#               protocol   pop3;
#               proxy      on;
#       }
#
#       server {
#               listen     localhost:143;
#               protocol   imap;
#               proxy      on;
#       }
#}
9. Under your home directory, create public_html and change owner to www-data. This will be your document root directory :
ehowstuff@ubuntu14:~$ sudo mkdir public_html/
ehowstuff@ubuntu14:~$ sudo chown -R www-data:www-data public_html/
10. Create index.php under document root directory :
ehowstuff@ubuntu14:~$ sudo vim public_html/index.php
Insert the following :
<?php
phpinfo();
?>
11. Now it’s turn to setup your NGINX. Please modify the default site.
ehowstuff@ubuntu14:~$ sudo vim /etc/nginx/sites-available/default
Kindly update the root directory and comment out the required lines as below :
# You may add here your
# server {
#	...
# }
# statements for each of your virtual hosts to this file

##
# You should look at the following URL's in order to grasp a solid understanding
# of Nginx configuration files in order to fully unleash the power of Nginx.
# http://wiki.nginx.org/Pitfalls
# http://wiki.nginx.org/QuickStart
# http://wiki.nginx.org/Configuration
#
# Generally, you will want to move this file somewhere, and start with a clean
# file but keep this around for reference. Or just disable in sites-enabled.
#
# Please see /usr/share/doc/nginx-doc/examples/ for more detailed examples.
##

server {
	listen 80 default_server;
	listen [::]:80 default_server ipv6only=on;

	root /home/ehowstuff/public_html;
	index index.html index.htm index.php;

	# Make site accessible from http://localhost/
	server_name localhost;

	location / {
		# First attempt to serve request as file, then
		# as directory, then fall back to displaying a 404.
		try_files $uri $uri/ =404;
		# Uncomment to enable naxsi on this location
		# include /etc/nginx/naxsi.rules
	}

	# Only for nginx-naxsi used with nginx-naxsi-ui : process denied requests
	#location /RequestDenied {
	#	proxy_pass http://127.0.0.1:8080;
	#}

        error_page 404 /404.html;

	# redirect server error pages to the static page /50x.html
	#
	error_page 500 502 503 504 /50x.html;
	location = /50x.html {
		root /usr/share/nginx/html;
	}

	# pass the PHP scripts to FastCGI server listening on 127.0.0.1:9000
	#
	location ~ \.php$ {
		fastcgi_split_path_info ^(.+\.php)(/.+)$;
	#	# NOTE: You should have "cgi.fix_pathinfo = 0;" in php.ini
	#
	#	# With php5-cgi alone:
		fastcgi_pass 127.0.0.1:9000;
	#	# With php5-fpm:
	#	fastcgi_pass unix:/var/run/php5-fpm.sock;
		fastcgi_index index.php;
		include fastcgi_params;
	}

	# deny access to .htaccess files, if Apache's document root
	# concurs with nginx's one
	#
	location ~ /\.ht {
		deny all;
	}
}


# another virtual host using mix of IP-, name-, and port-based configuration
#
#server {
#	listen 8000;
#	listen somename:8080;
#	server_name somename alias another.alias;
#	root html;
#	index index.html index.htm;
#
#	location / {
#		try_files $uri $uri/ =404;
#	}
#}


# HTTPS server
#
#server {
#	listen 443;
#	server_name localhost;
#
#	root html;
#	index index.html index.htm;
#
#	ssl on;
#	ssl_certificate cert.pem;
#	ssl_certificate_key cert.key;
#
#	ssl_session_timeout 5m;
#
#	ssl_protocols SSLv3 TLSv1 TLSv1.1 TLSv1.2;
#	ssl_ciphers "HIGH:!aNULL:!MD5 or HIGH:!aNULL:!MD5:!3DES";
#	ssl_prefer_server_ciphers on;
#
#	location / {
#		try_files $uri $uri/ =404;
#	}
#}
12. Restart your nginx and php5-fpm service to take effect all changes :
ehowstuff@ubuntu14:~$ sudo service nginx restart
ehowstuff@ubuntu14:~$ sudo service php5-fpm restart
13. Test your NGINX site by visit http://IP-Adress :

Done!!!

1 Comment
I found a way to make this process even simpler. There is a very useful script – Easy Engine, which can be installed by following the tutorial at
https://www.rosehosting.com/blog/how-to-install-nginx-php5-fpm-mysql-phpmyadmin-postfix-on-a-ubuntu-server-using-easy-engine-shell-script/